Managing your team
Inviting a new user
To add someone to your Chronity Connect workspace:
- Click New User in the sidebar under People (or click the Invite User button on the Users page).
- You'll see the New User Setup form.
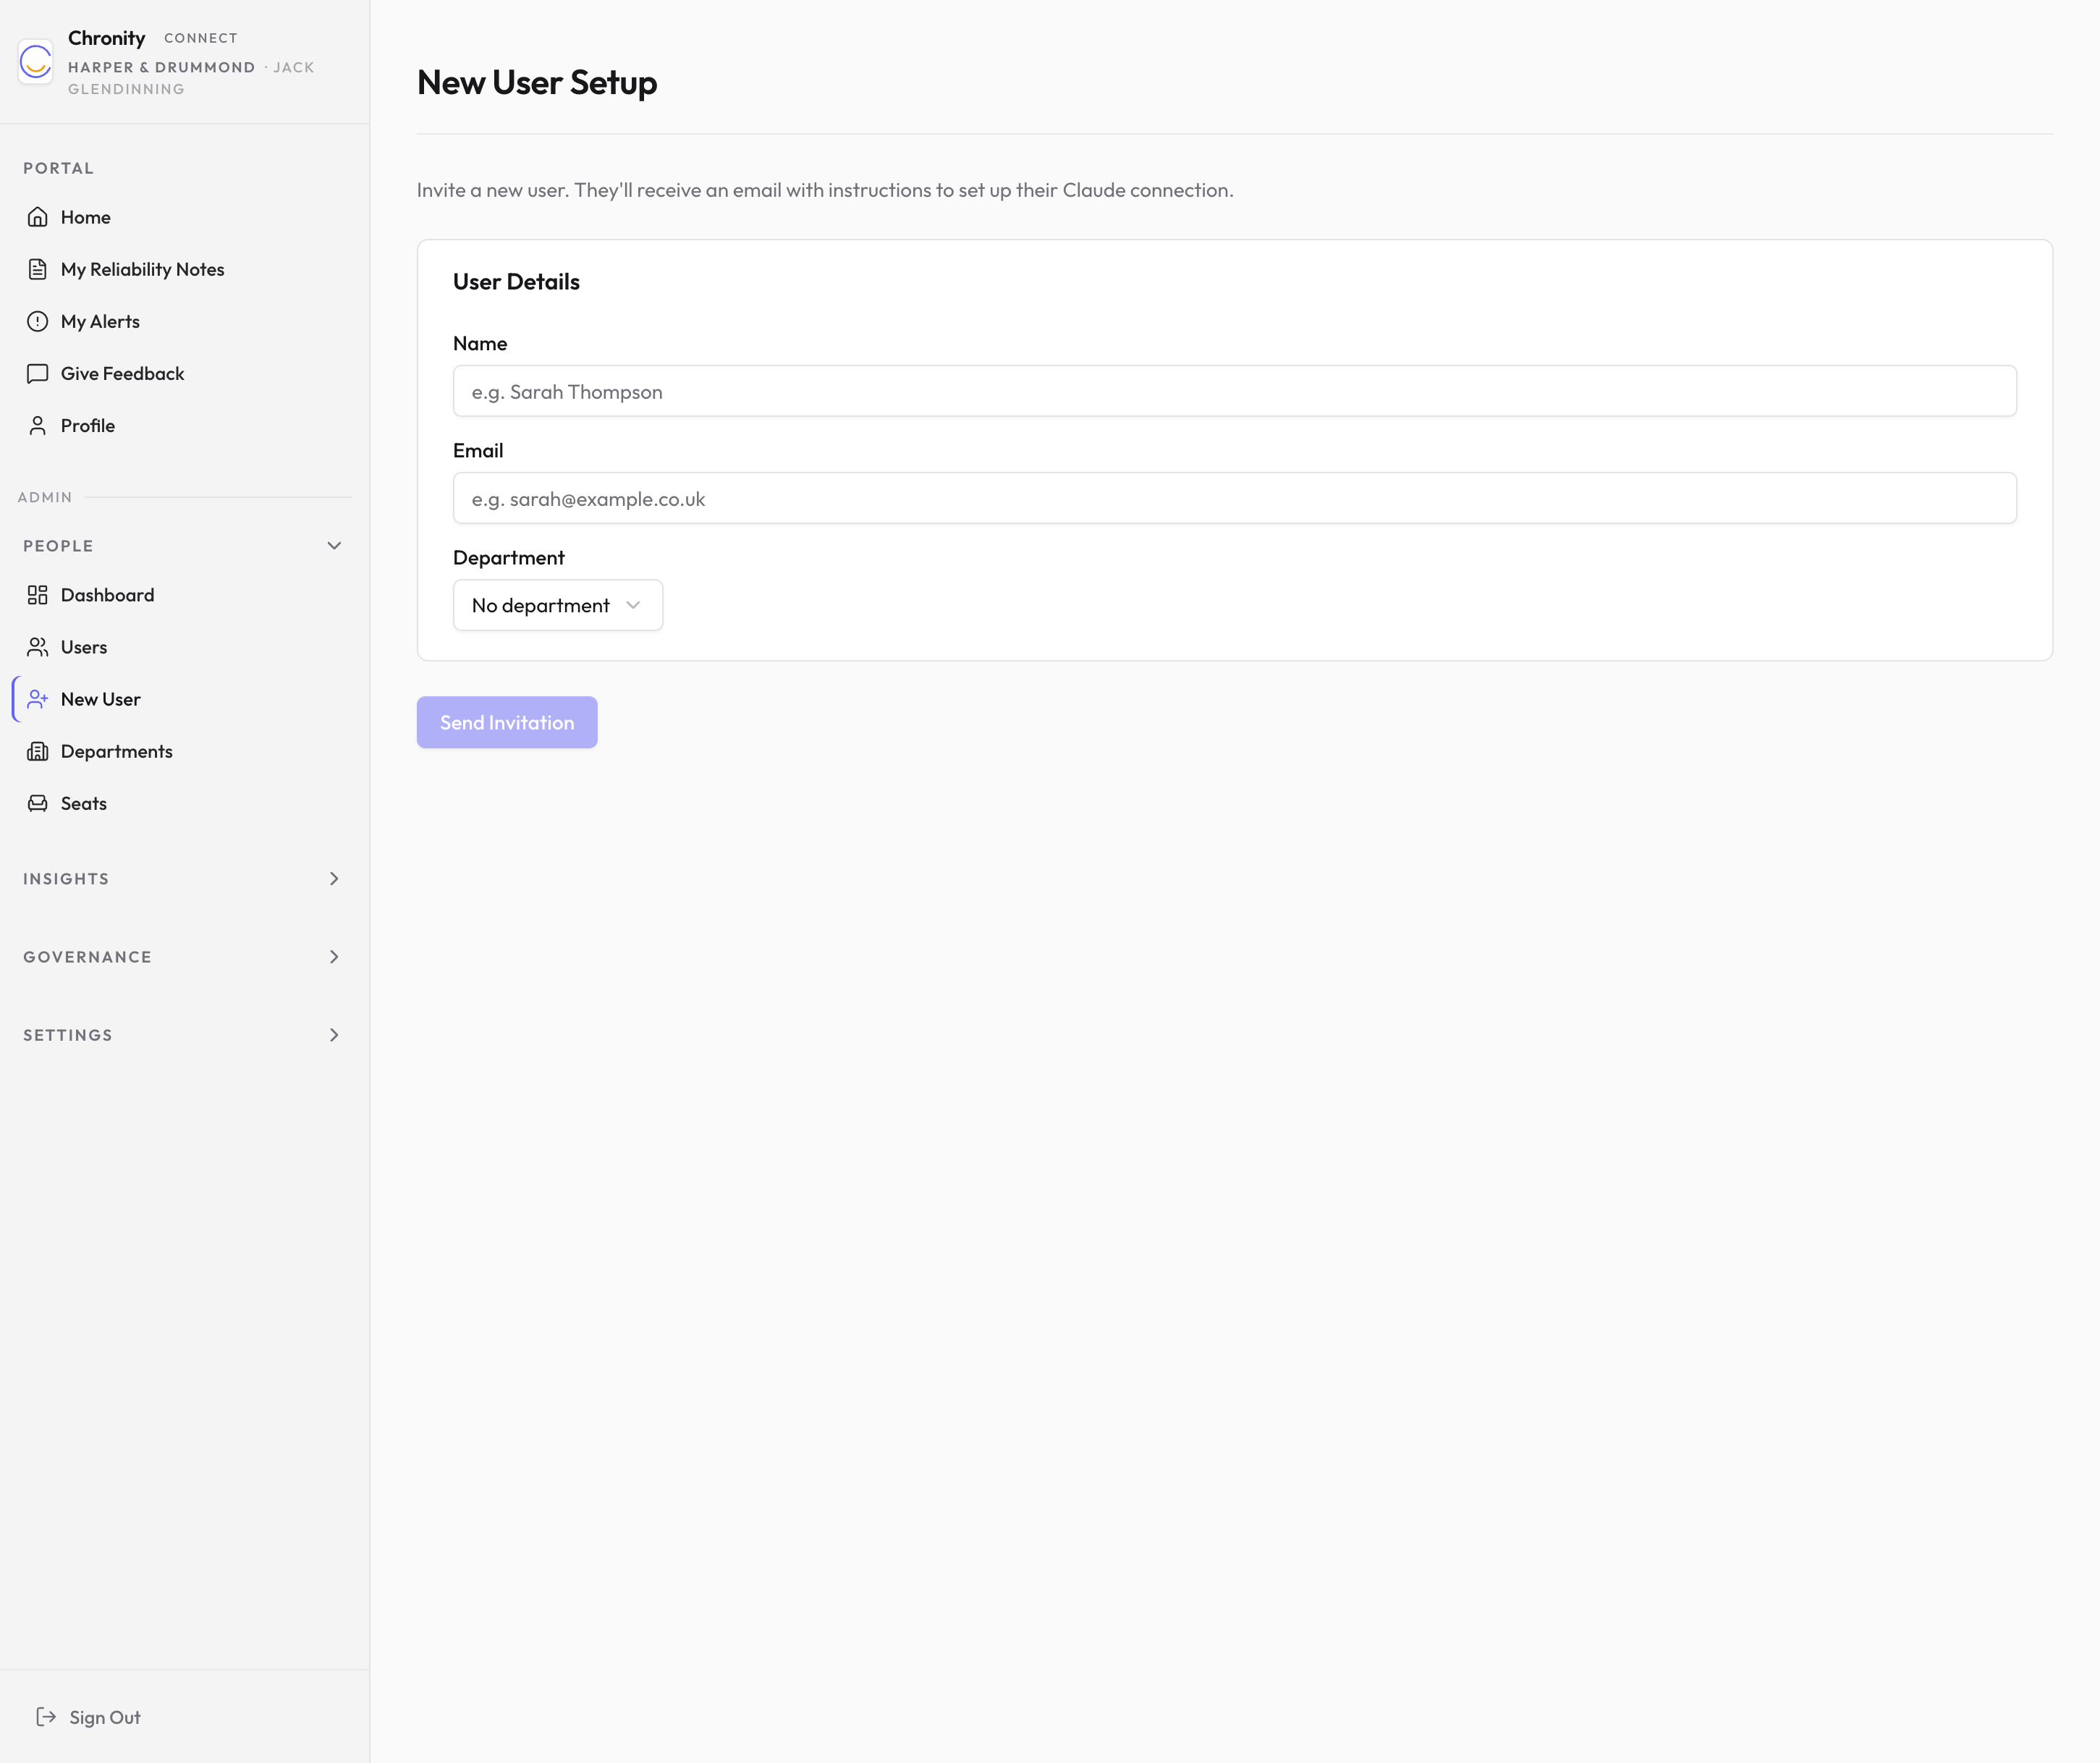
- Enter the person's Name and their Email address (this must be their Microsoft 365 work email).
- Optionally, choose a Department from the dropdown if you've already set up departments.
- Click Send Invitation.
The person will receive an email with instructions to connect their Claude AI assistant to Chronity Connect. Once they complete the setup, their status will change from "Invited" to "Connected" on the Users page.
Tip
You'll need an available seat on your subscription to invite a new user. Check the Seats page if you're unsure how many seats you have left.
The Users list
Click Users in the sidebar to see everyone in your workspace.
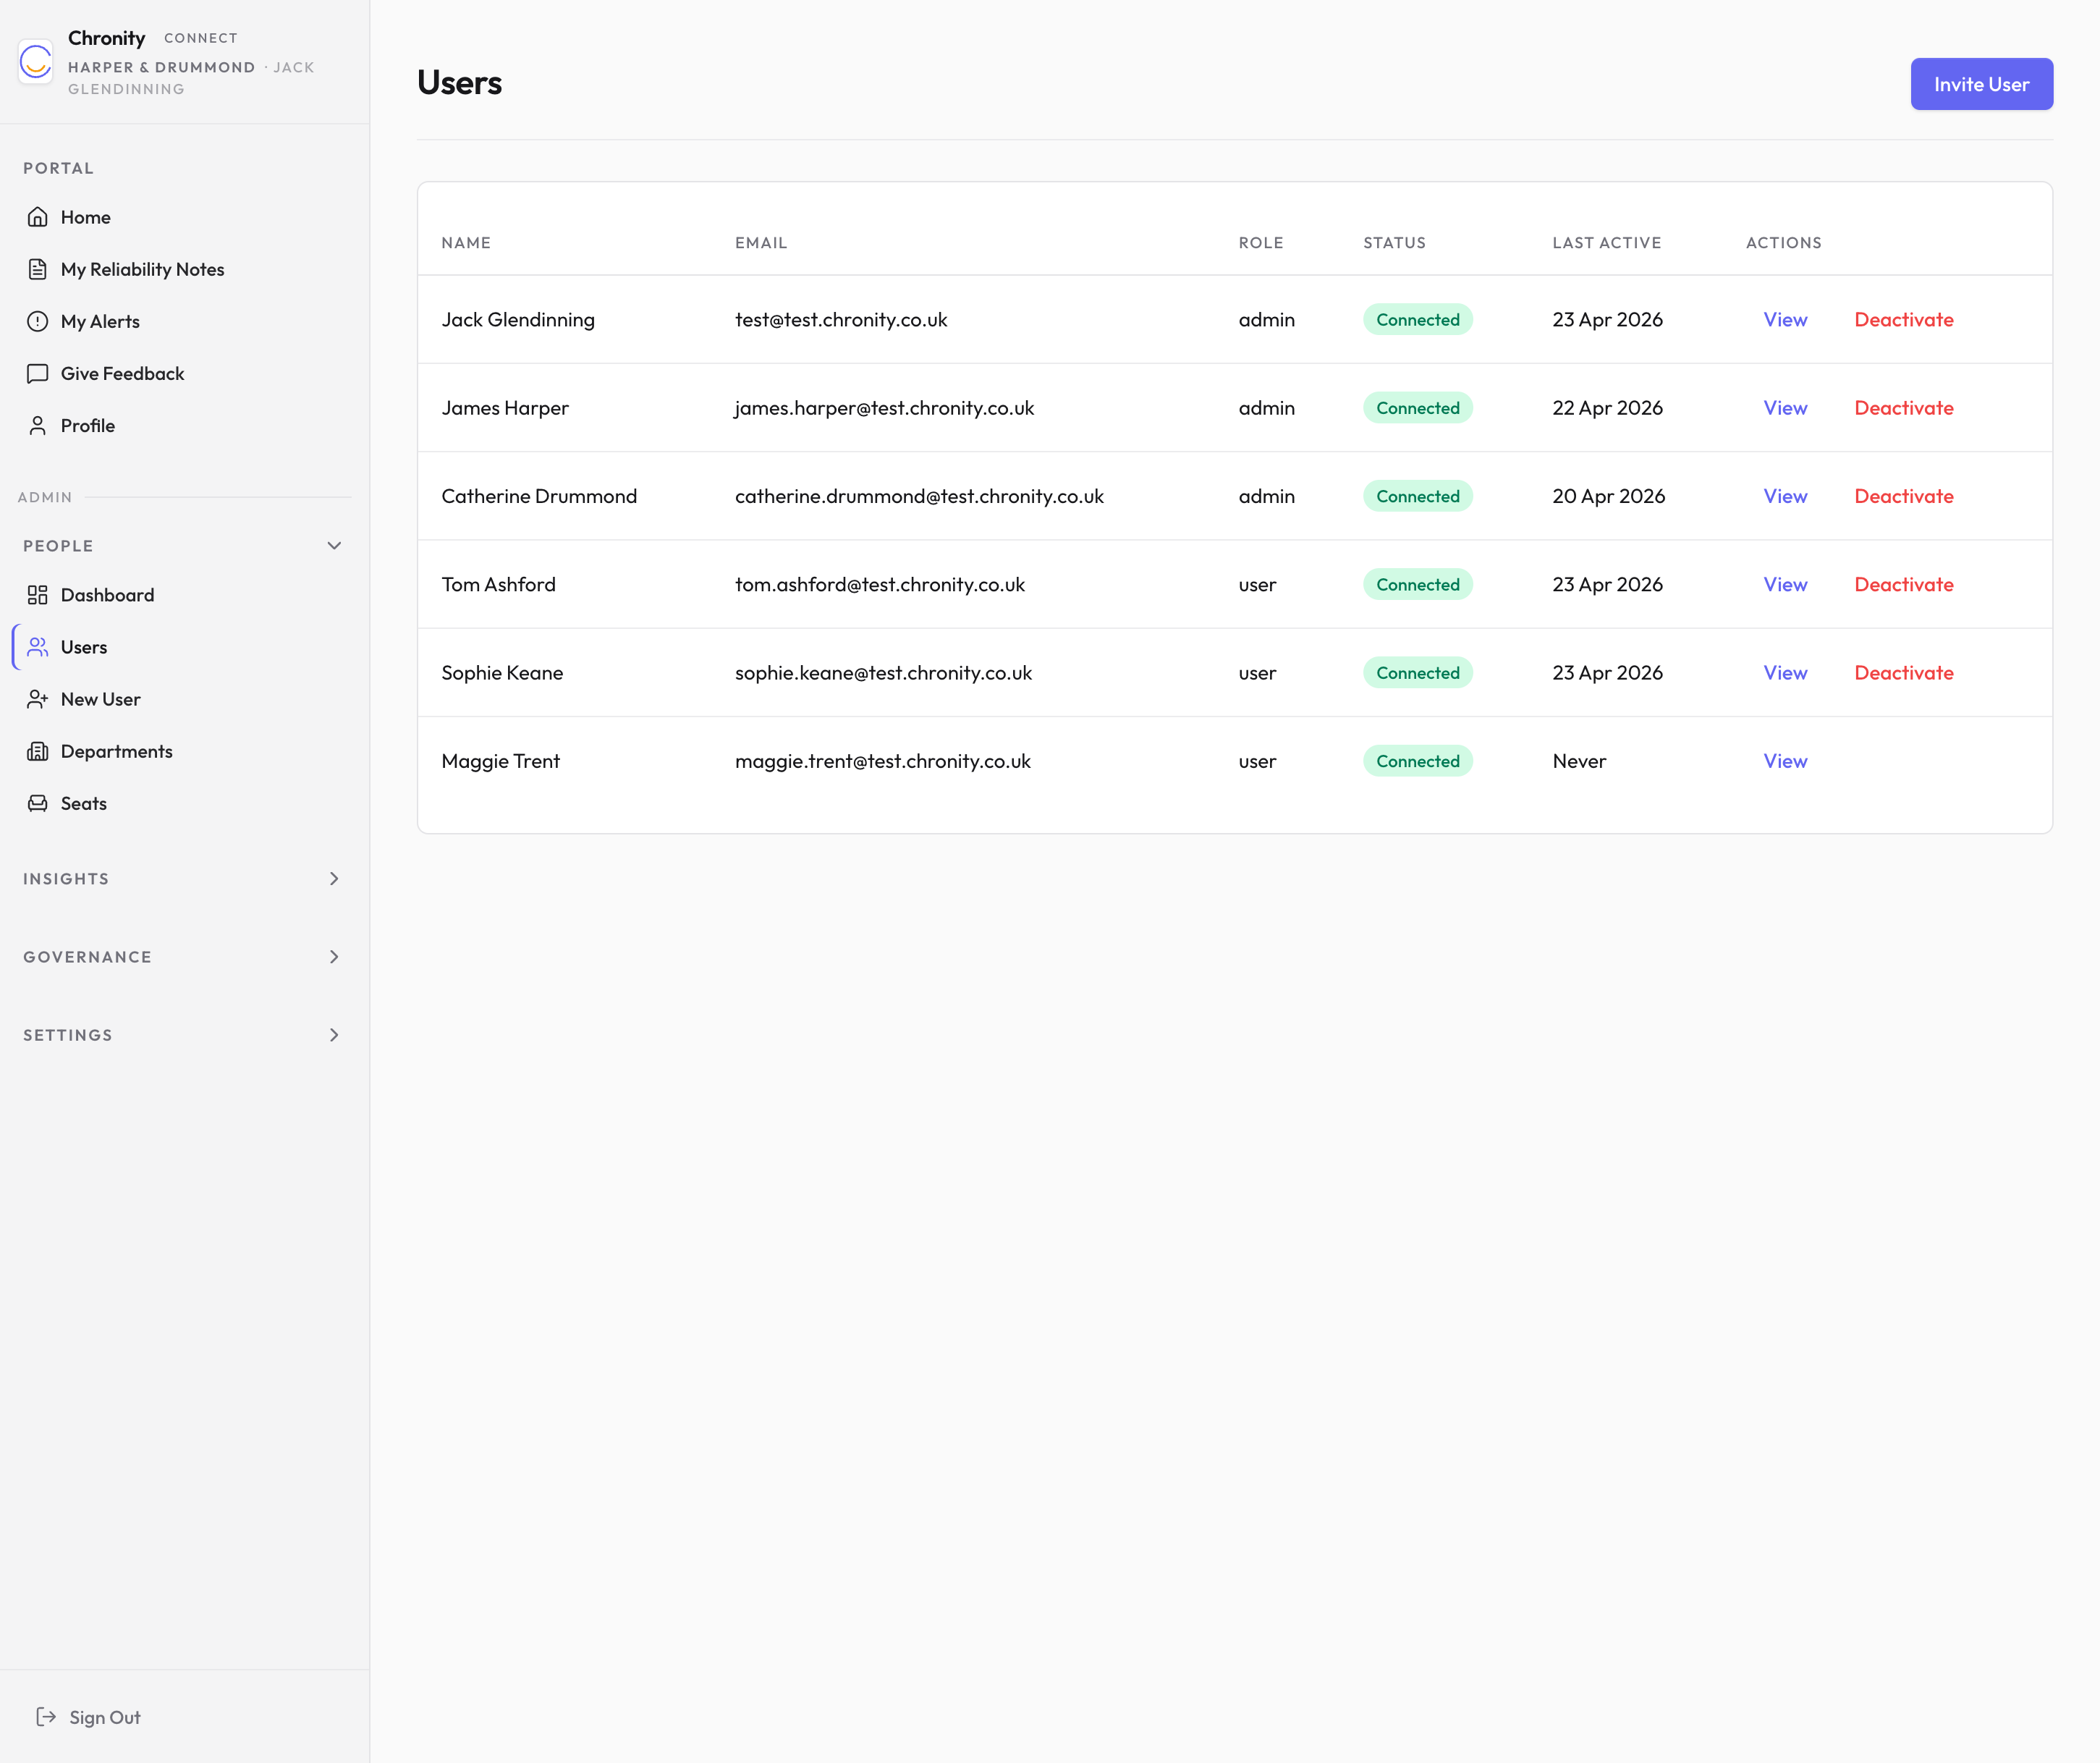
The table shows:
| Column | What it means |
|---|---|
| Name | The person's display name. |
| Their Microsoft 365 email address. | |
| Role | Either "admin" (can access all admin screens) or "member" (standard user). |
| Status | Their connection status — Connected (green) means their Claude assistant is linked and active. You may also see Invited (awaiting setup) or Inactive. |
| Last Active | When they last used an AI-assisted tool through Chronity Connect. |
| Actions | View opens their detail page. Deactivate removes their access (you'll be asked to confirm). |
User details
Click View on any user to see their full profile.
The user detail page shows:
- Header — their name, email, role, status, and when they joined.
- Write permissions — toggle whether the user can send emails, create calendar events, or send Teams messages through Claude. Read access is always on — these toggles control whether Claude can take actions on their behalf.
- Supervisor — assign a senior team member to oversee this person's AI activity. The supervisor will see this user's observations and receive daily digest emails. Choose from the dropdown — you can't assign someone as their own supervisor.
- Usage (last 30 days) — a breakdown of which tools the user has called and how often.
- Promote / Demote — make the user an admin (giving them access to all admin screens) or demote them back to a standard member.
- GDPR — export all of the user's data as a file, or permanently delete their data (requires typing a confirmation phrase).
Important
Deactivating a user frees up their seat but does not delete their data. Their historical observations and file notes are preserved for your compliance records.
Departments
Departments let you organise your team into groups — for example, "Residential", "Commercial", "Rural", or "Accounts". Observations can be filtered by department, and encryption keys are scoped per department for added security.
Click Departments in the sidebar.
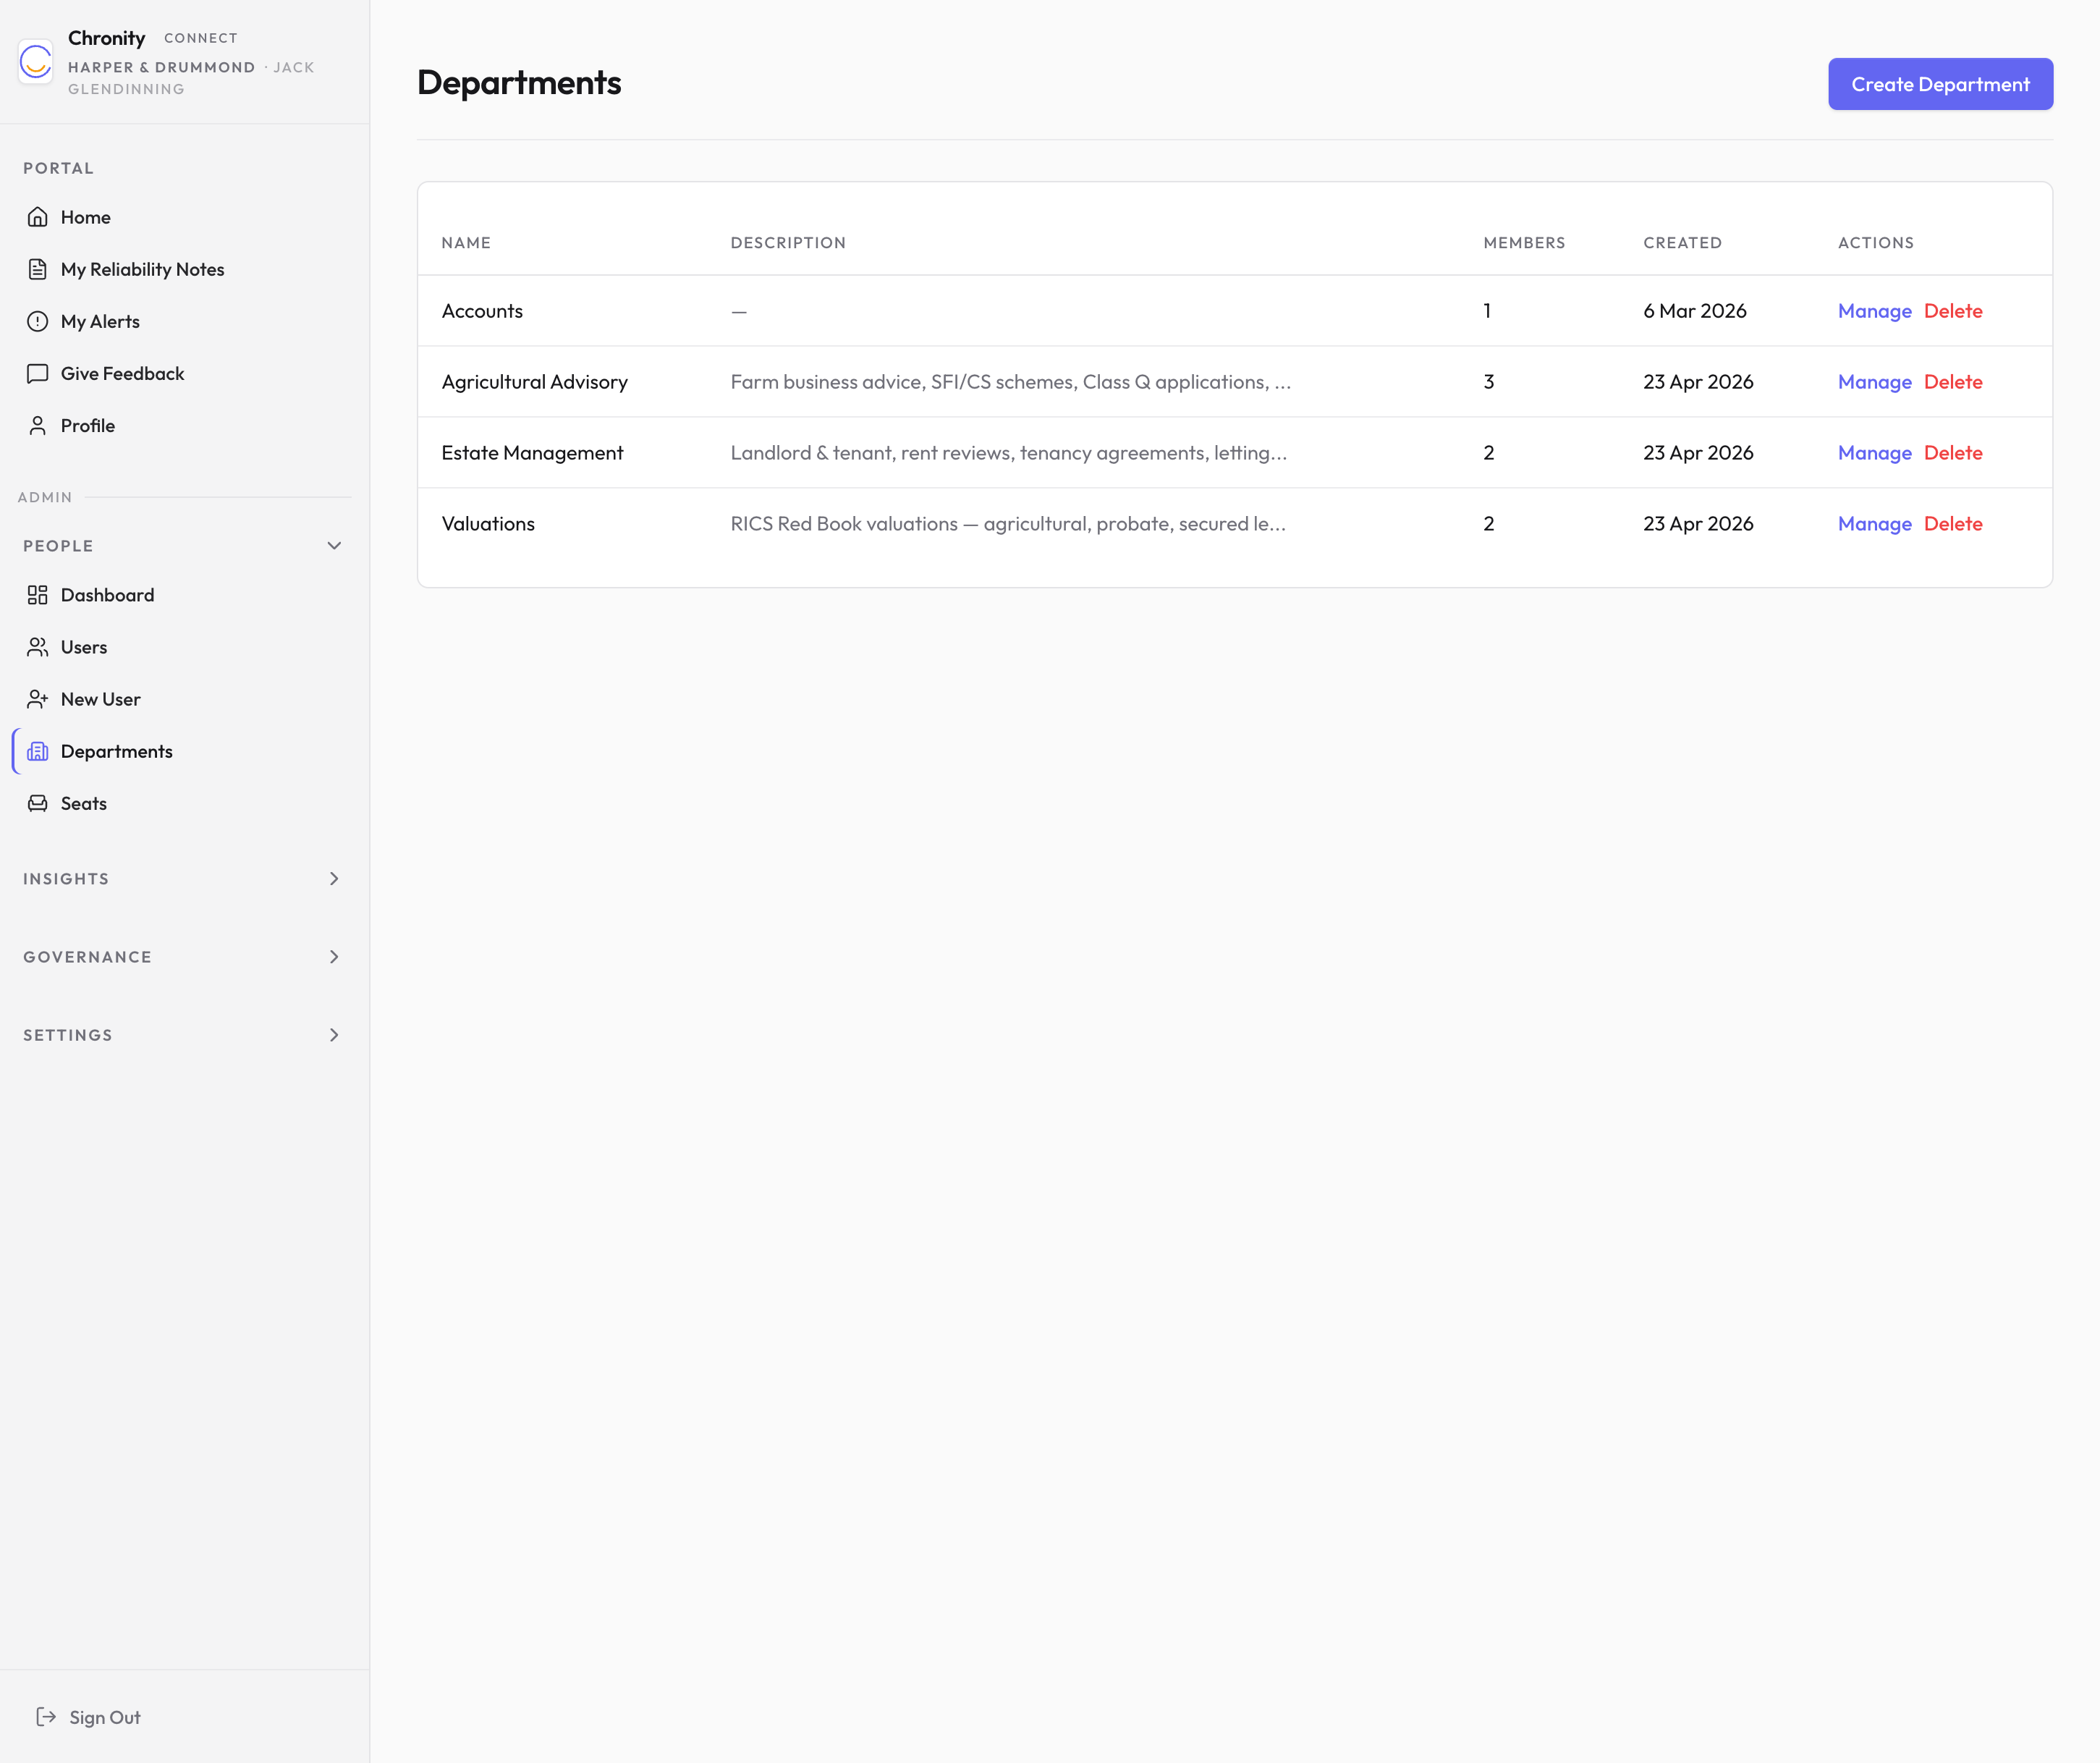
Creating a department
- Click the Create Department button in the top right.
- Enter a Name (required) and an optional Description.
- Click Create.
Managing members
- Click Manage next to the department you want to edit.
- You'll see the department's current members.
- Click Add Member to add someone — choose from a dropdown of users who aren't already in this department.
- To remove someone, click Remove next to their name (you'll be asked to confirm).
Editing or deleting a department
- Click Manage and then the Edit button to change the department's name or description.
- Click Delete on the main Departments page to remove a department entirely (you'll be asked to confirm). This doesn't affect the users — they simply won't be assigned to that department any more.
Seats and subscription
The Seats page shows how your subscription is being used.
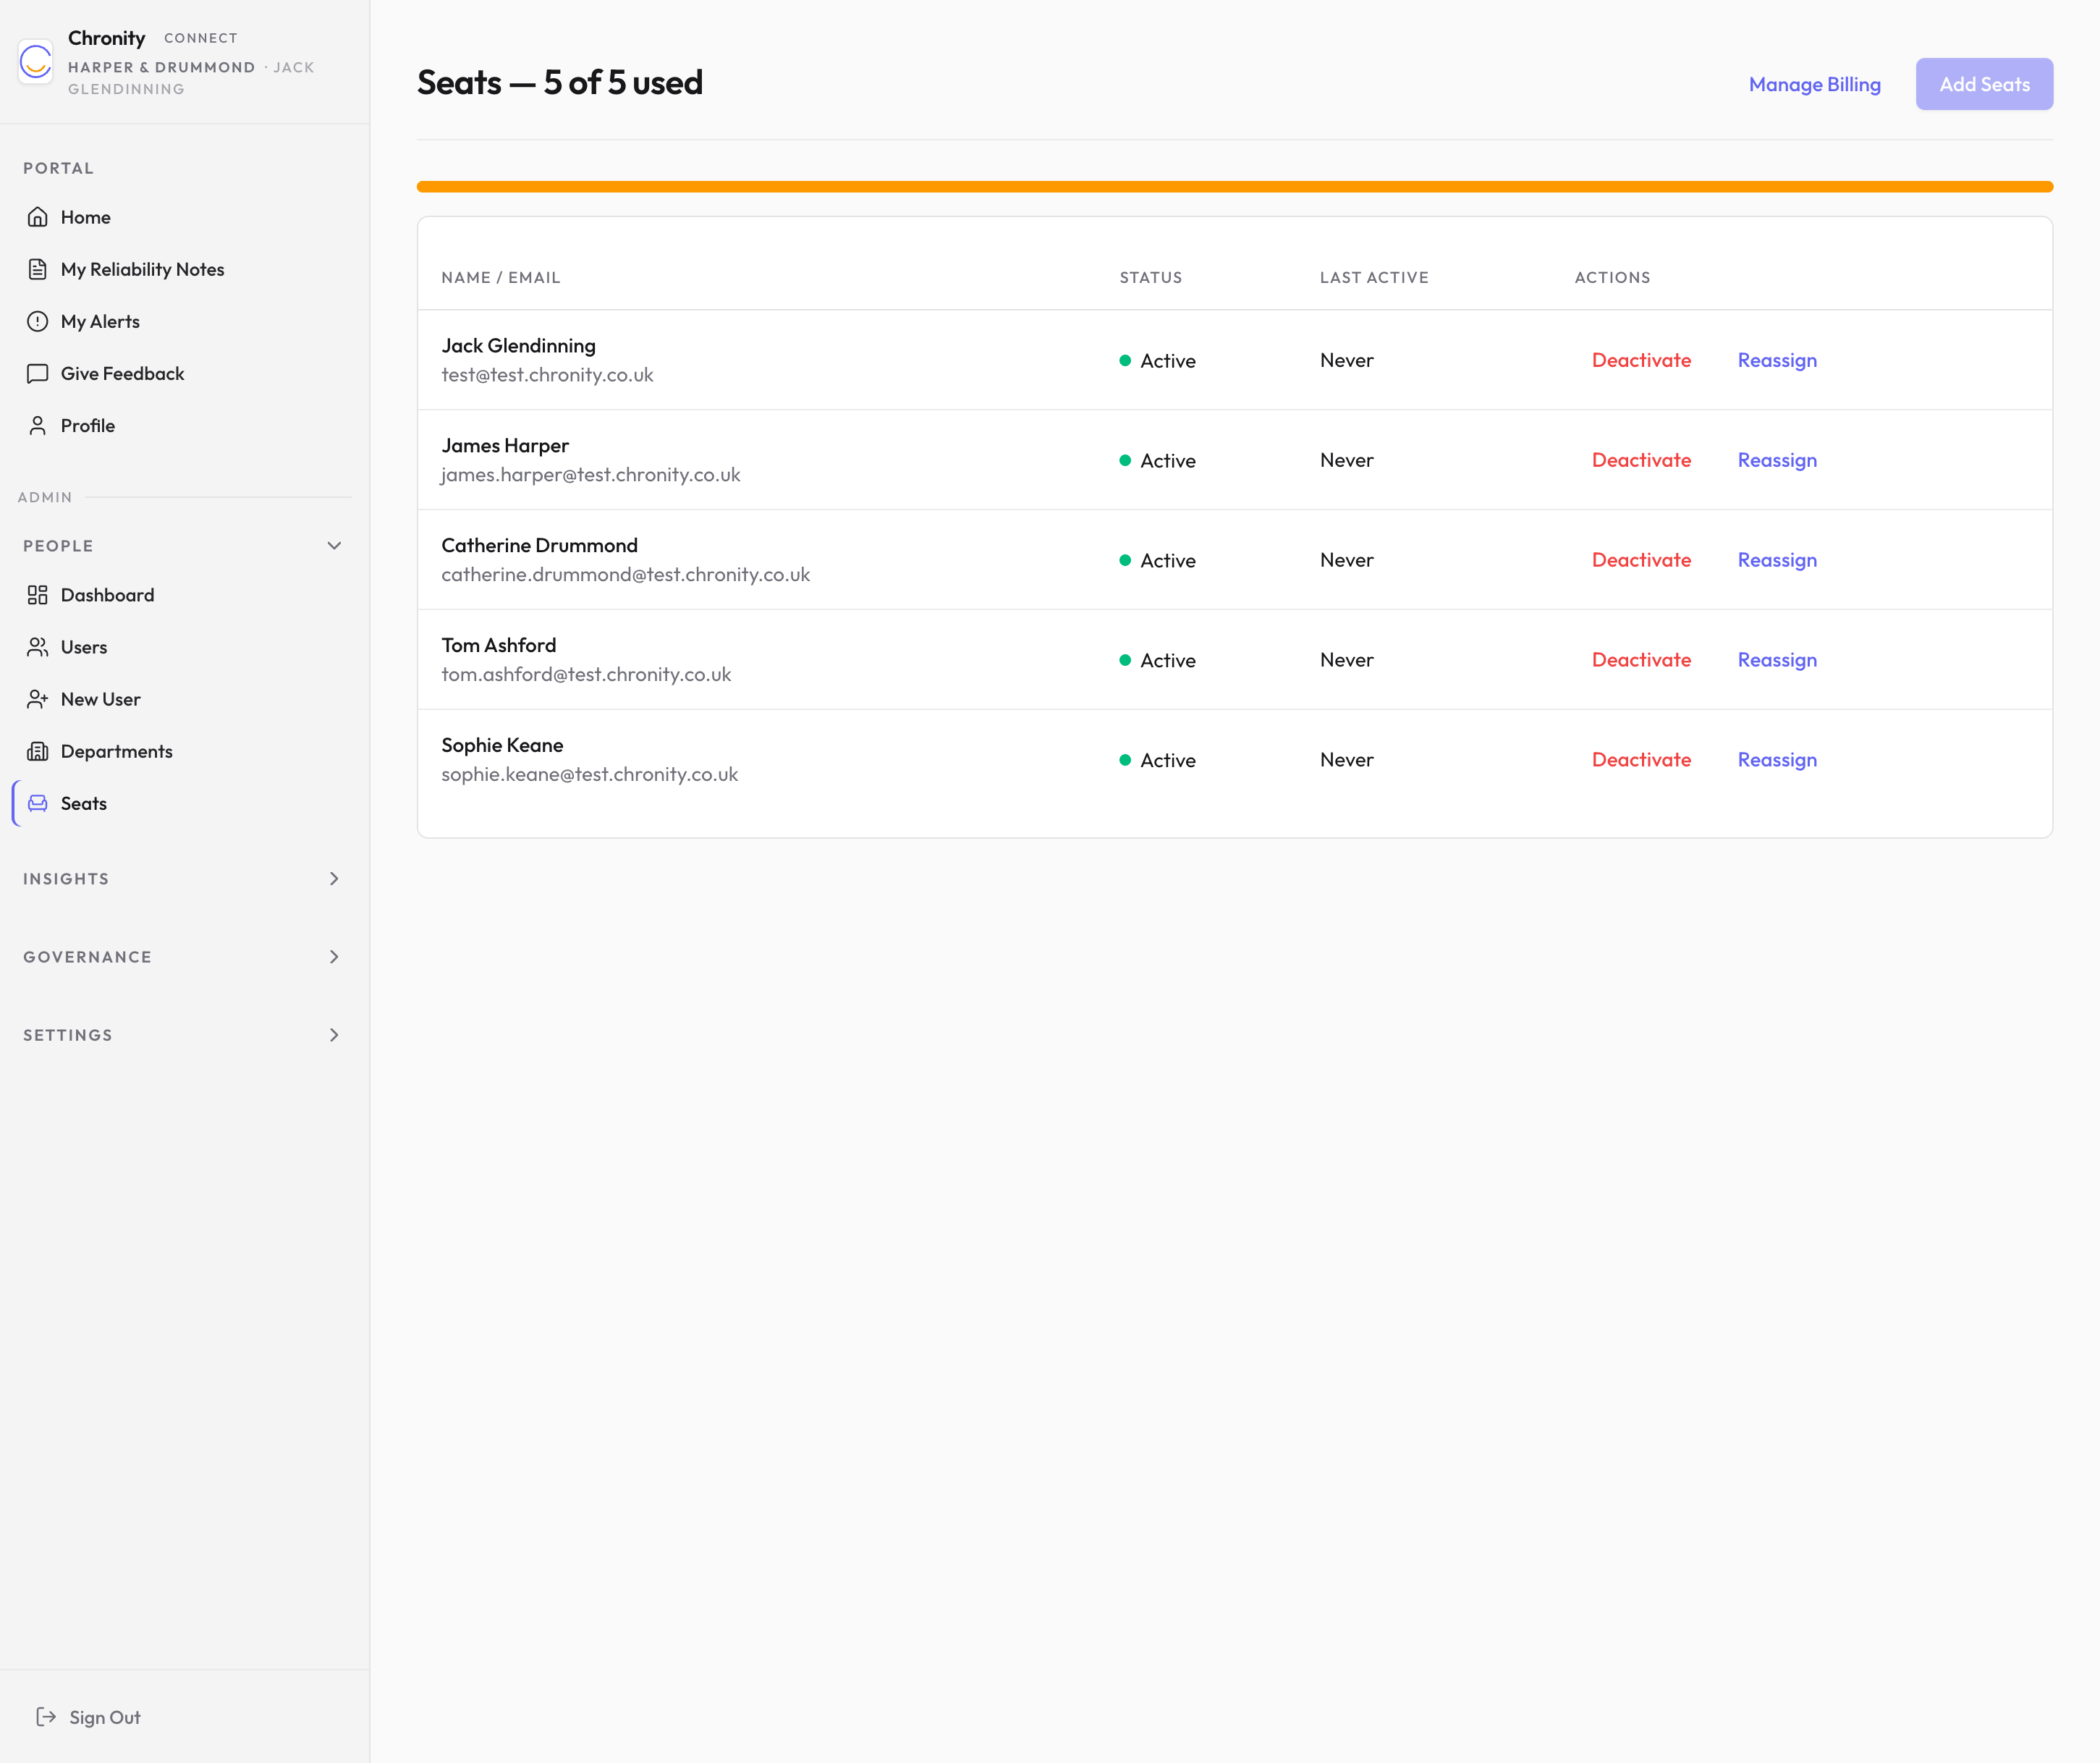
At the top, you'll see a summary — for example, "Seats — 1 of 5 used" — with a progress bar showing how much of your allocation is taken.
The table below lists every seat on your plan:
| Column | What it means |
|---|---|
| Name / Email | Who the seat is assigned to. |
| Status | Active (connected and in use), Invited (invitation sent, not yet set up), or Deactivated. |
| Last Active | When this person last used an AI tool through Chronity Connect. |
| Actions | Deactivate removes the person's access and frees the seat. Reassign transfers the seat to someone else. |
Adding more seats
Click the Add Seats button to increase your allocation. This will adjust your subscription billing accordingly.
Managing billing
Click Manage Billing (top right) to open your Stripe billing portal, where you can update your payment method, view invoices, and manage your subscription.
Tip
If your subscription falls past due, your workspace will enter read-only mode after seven days. Users can still view their data, but Claude won't be able to take actions until payment is resolved.